
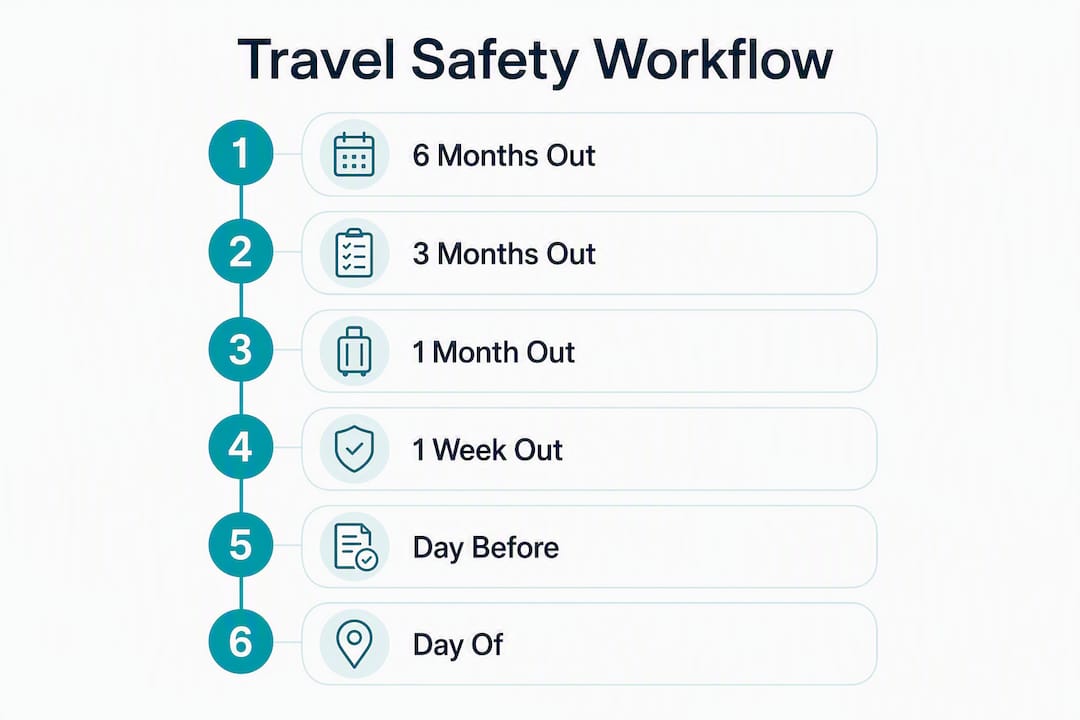
A solid vacation safety preparation workflow runs in four stages: Documents, Health, Home, and On-Trip. Start passport and visa checks at least six months out, book a travel health appointment 4–6 weeks before departure per CDC guidance, and complete home security and packing tasks in the final week. Here is the priority checklist to get you started:
- Documents: Check passport validity (many countries require six months beyond your return date), confirm visa or ETA requirements, make digital and printed copies of all travel documents
- Health: Schedule a travel health visit several weeks out, refill prescriptions with extra supply, pack meds in original labeled containers
- Home security: Stop mail, set light timers, confirm alarm system, arrange pet care
- Money and phone: Notify your bank, carry two payment methods, back up your phone, download offline maps
- Safety kit: Pack a first-aid kit, power bank, emergency cash, and a multi-tool
- Emergency contacts: Save local emergency numbers, your embassy's contact, and enroll in the State Department's STEP program
Compact timeline:
- 6+ months: Passport check and renewal if needed; begin destination research
- 2–3 months: Book flights, hotels, and travel insurance; start visa applications
- Several weeks before departure: Travel health appointment, vaccinations, prescription refills
- 1 week: Home prep, packing, share itinerary with contacts
- 24–48 hours: Final bag check, charge all devices, confirm reservations
Table of Contents
- What does your pre-departure safety checklist look like by milestone?
- How do you build a travel safety kit that actually works?
- How do you stay safe while you're actually traveling?
- What medical and emergency prep do you actually need?
- How do you protect your money and devices while traveling?
- What destination-specific research should you do before you go?
- A staged workflow model you can copy right now
- Key Takeaways
- Why a staged workflow beats last-minute scrambling
- Destlist handles the planning so you can focus on the trip
- Useful sources for further reading
What does your pre-departure safety checklist look like by milestone?
A timed, milestone-based approach to your travel safety plan prevents the two most common failures: missing a passport renewal window and skipping travel insurance until it's too late.
| Milestone | Key Tasks | Typical Cost |
|---|---|---|
| 6+ months | Passport check/renewal, destination research, travel advisory review | The cost of a new U.S. passport varies depending on services |
| 2–3 months | Book flights and hotels, purchase travel insurance, start visa application | Travel insurance cost depends on trip price |
| 4–6 weeks | Travel health appointment, vaccinations, prescription refills | Vaccination and health appointment costs vary widely by vaccine and location |
| 1–2 weeks | Car maintenance check, home prep, arrange pet care, stop mail | Car maintenance costs depend on services performed and vehicle condition |
| 24–72 hours | Final packing, charge devices, confirm all reservations, share itinerary | Minimal |
The six tasks that matter most at each stage
- 2–3 months out: — Buy travel insurance the same week you book your trip. Policies purchased close to departure often exclude pre-existing conditions and cancel-for-any-reason windows. Compare coverage for trip cancellation, medical evacuation, and baggage loss.
- 1–2 weeks out: Take your car to a mechanic if you're road-tripping. Check tire pressure on cold tires using the value on the driver-side door jamb, not the tire sidewall, per NHTSA guidance. Confirm oil level, brakes, and wipers.
Pro Tip: Set calendar reminders for each milestone the day you book your trip. A 10-minute setup now saves a frantic week later. Use Google Calendar or Apple Calendar and invite a travel partner so both of you get the alerts.
How do you build a travel safety kit that actually works?
Most travelers pack for comfort and forget safety. A well-organized safety kit fits inside a single packing cube and covers the scenarios that actually derail trips: minor injuries, lost documents, dead devices, and medical emergencies.
The core safety kit
- Power and light: — A power bank (10,000 mAh minimum), universal travel adapter, and a small LED flashlight or headlamp
Carry-on vs. checked bag split
Your carry-on is your lifeline if checked luggage is lost or delayed. Keep all medications, travel documents, phone charger, one change of clothes, and your insurance card in your carry-on. The safety kit's bulkier items (multi-tool, extra shoes, full-size toiletries) go in checked bags.
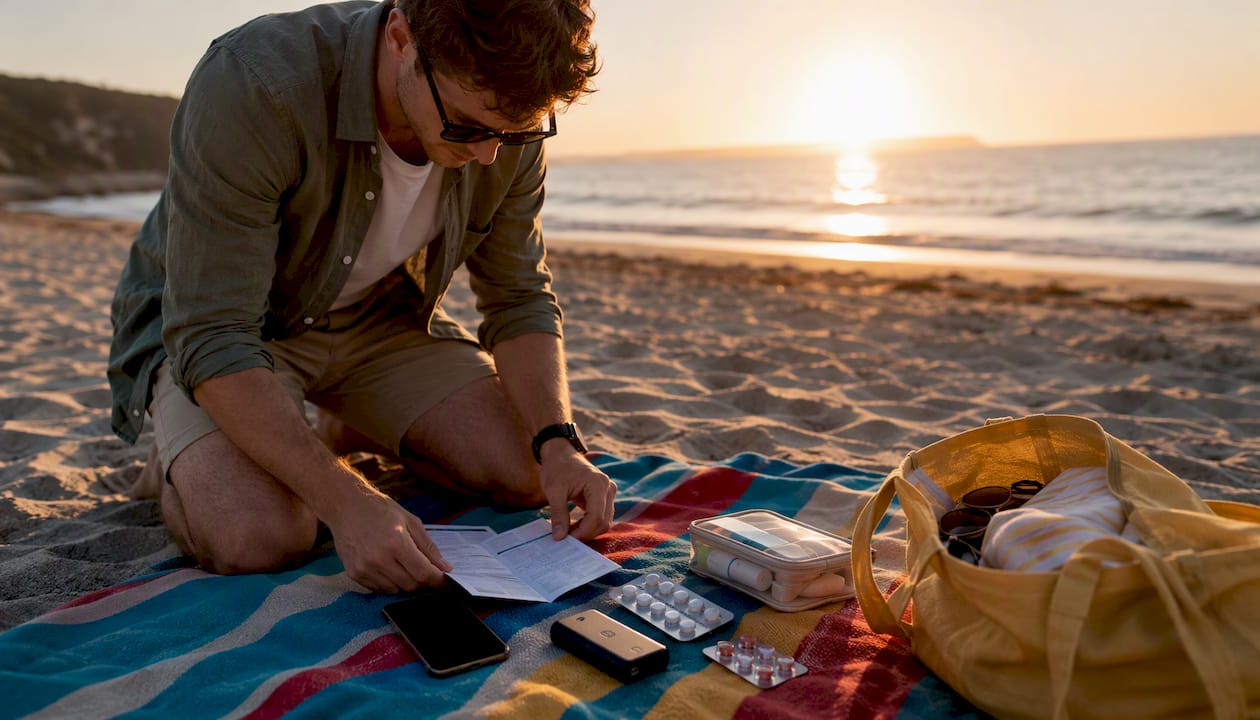
Start packing with ample lead time before departure. Lay everything out to streamline packing. Finalize and weigh bags well before your flight. For destination-specific gear, the adventure travel checklist from Traveling Portrait covers specialized kit for hiking, diving, and remote trips.
Pro Tip: Ask your pharmacist to print a medication summary sheet that lists both brand and generic names, dosages, and prescribing doctor. Customs officers and foreign pharmacies respond much better to that than to a handwritten note.
How do you stay safe while you're actually traveling?
Preparation gets you to the destination. These habits keep you safe once you're there.
Transit and airport safety
- Keep your carry-on in sight at all times in airports. Theft at security lanes is common: place your bag on the belt last and walk through the scanner first.
- Verify your rideshare driver's name, photo, and license plate before getting in. Confirm the destination before the car moves.
- On public transit, wear your backpack on your front in crowded stations. Keep your phone in a front pocket or a zipped inner compartment.
- Save printed or downloaded copies of hotel addresses and transit directions. Cell service drops at the worst moments.
Theft and personal security
Pickpockets target distraction, not darkness. The highest-risk moments are boarding a bus, standing at an ATM, and eating at a sidewalk café. Use ATMs inside banks during business hours, shield the keypad, and pocket your card before stepping away. A money belt worn under clothing is more effective than any anti-theft bag for carrying your passport and backup cash.
Keep a low profile. Expensive jewelry, visible camera equipment, and loud conversations in English in non-English-speaking countries all signal "tourist." That is not a reason to stay home; it is a reason to be deliberate.
Road-trip safety
Drowsy driving is a serious crash risk, and the fix is simple: stop every two hours, cap total daily driving at eight hours, and never push through fatigue to make a deadline. Rotate drivers when possible. Before you leave, check tire pressure on cold tires (parked at least three hours) using the vehicle-specific value in the driver-side door jamb.
Pack a roadside emergency kit: jumper cables, a reflective triangle, a basic tool kit, a blanket, and a gallon of water. These cost under $50 and cover the most common breakdown scenarios.
Water and outdoor safety
Swim only at beaches and pools with lifeguards on duty. Wear a personal flotation device on any boat, regardless of how calm the water looks. Before any hiking or water activity, tell someone your exact plan: where you're going, your route, and when you expect to return.
Pro Tip: Download your destination's offline map in Google Maps or Maps.me before you leave your hotel each morning. GPS still works without cell service, and you won't be standing on a street corner staring at a spinning loading wheel.
What medical and emergency prep do you actually need?
Health prep is the most skipped part of a vacation preparation guide, and it's the one that causes the most expensive problems.
Timing your health visit
Schedule a travel health appointment 4–6 weeks before departure. That window gives your doctor time to administer vaccines that require multiple doses, write prescriptions for destination-specific medications (like antimalarials), and review your existing conditions against the destination's health risks. The CDC's travelers' health guidance recommends bringing enough prescription medication to cover your entire trip plus extra days for delays.

What to bring and document
Carry all prescriptions in original pharmacy containers. Bring a written list of every medication with its generic name, dosage, and prescribing physician's contact. Add your blood type, known allergies, and your travel insurance policy number to that document. Store one copy in your carry-on and one in secure cloud storage.
Before you leave, confirm your travel insurance covers emergency medical evacuation. Standard policies often cap medical coverage at amounts that won't cover an air ambulance from a remote destination. Medical evacuation can cost $50,000 or more from certain regions. Read the policy, not just the summary card.
Your emergency communication plan
Save these contacts in your phone before departure and write them on a card in your wallet:
- Local emergency number at your destination (not always 911)
- Nearest U.S. embassy or consulate address and phone number
- Your travel insurance 24-hour emergency line
- One trusted contact at home who has your full itinerary
Register with the State Department's Smart Traveler Enrollment Program (STEP) before international travel. STEP sends you official alerts from the U.S. embassy at your destination and helps consular staff locate you in an emergency. Enrollment is free and takes five minutes at travel.state.gov.
When a medical event happens abroad, call your insurance emergency line first. They coordinate with local providers, arrange payment guarantees, and can organize evacuation if needed. Paying out of pocket and filing for reimbursement later works for minor costs; for anything serious, the insurance company's coordination is worth more than the reimbursement.
How do you protect your money and devices while traveling?
Digital security and financial safety are part of the same workflow. A stolen phone with no lock screen is as damaging as a stolen wallet.
Money prep
- Notify your bank and credit card companies of your travel dates and destinations before you leave. Fraud alerts on unfamiliar foreign charges can freeze your card at the worst moment.
- Carry two payment methods: one credit card and one debit card, kept in separate locations. Many credit cards offer rental-car insurance and travel medical coverage as card benefits; check yours before buying duplicate coverage.
- Keep a small reserve of local currency in cash, separate from your main wallet. $50–$100 equivalent covers taxis, tips, and emergencies when cards fail.
- Check whether your debit card charges foreign transaction fees. If it does, consider opening a no-fee travel account before departure.
Device prep
Back up your phone and laptop to cloud storage the night before departure. Enable two-factor authentication on email, banking, and travel apps. Set a strong lock screen PIN (not biometric only, since customs officers in some countries can compel fingerprint unlocks). Activate remote-wipe capability on all devices.
Install and test a VPN before you leave home. Public Wi-Fi in airports, hotels, and cafés is convenient and risky. Use your VPN any time you connect to a network you don't control, and avoid logging into banking apps on open networks entirely.
A hybrid storage system for travel documents — cloud backup plus printed copies — gives you access to your passport scan, insurance policy, and hotel confirmations whether your phone is dead, stolen, or offline.
Pro Tip: Create a single encrypted note (in Apple Notes with a password, or in a password manager like 1Password or Bitwarden) that contains your card numbers, emergency contact numbers, and insurance policy details. Print one copy and seal it in your luggage. Never store PINs in the same document.
What destination-specific research should you do before you go?
Generic safety prep covers most situations. Destination-specific research covers the ones that catch people off guard.
Check official travel advisories first
The U.S. State Department publishes travel advisories for every country, rated Level 1 (normal precautions) through Level 4 (do not travel). Check your destination's level and read the full advisory, not just the headline. Advisories cover crime patterns, civil unrest, health risks, and entry requirements that general travel sites miss.
Register with STEP as soon as you book international travel. The Smart Traveler Enrollment Program connects you to the nearest U.S. embassy or consulate automatically. If a natural disaster, political crisis, or medical emergency occurs, consular staff can reach you directly. It takes five minutes and costs nothing.
Passport and visa requirements
Many countries enforce a six-month passport validity rule beyond your return date. Verify this for your specific destination at the State Department's country information pages. Visa and ETA requirements vary widely: some take days to approve online, others require weeks of processing and supporting documents. Use Destlist's visa requirements checker to confirm what your nationality needs for your destination before you assume you can enter visa-free.
Local research checklist
- Weather: — Look up the typical weather pattern for your travel dates, not just the average temperature. Monsoon season, hurricane season, and wildfire season all affect safety planning.
A staged workflow model you can copy right now
This four-phase framework maps every safety task to an owner, a deadline, and a confirmation step. Adapt it to your trip type.
The four phases
- Phase 1 (6+ months): — Passport check, destination research, travel advisory review, initial budget for insurance and health costs
- Phase 3 (4–6 weeks): Travel health appointment, vaccinations, prescription refills, travel planning checklist review, packing list draft
Ownership and delegation table
| Task | Owner | Deadline | Confirmation |
|---|---|---|---|
| Passport validity check | You | 6+ months out | Expiry date confirmed in writing |
| Visa / ETA application | You | 2–3 months out | Approval email saved to cloud |
| Travel insurance purchase | You | Day of booking | Policy number saved and printed |
| Travel health appointment | You | 4–6 weeks out | Vaccination record in carry-on |
| Car maintenance check | You / mechanic | 1–2 weeks out | Receipt or checklist signed off |
| Mail hold and home security | You / neighbor | 1 week out | USPS confirmation, neighbor briefed |
| Pet care arrangement | Partner / pet sitter | 2–3 weeks out | Confirmed booking with vet contact |
| Itinerary shared with contacts | You | 48 hours out | Sent to 2+ people and saved to cloud |
| Device backup and VPN test | You | Night before | Backup confirmed, VPN connected |
Copyable checklist template
Copy this into any checklist app (Todoist, Apple Reminders, Google Tasks) and assign due dates:
- Passport valid 6+ months past return date
- Visa or ETA approved and saved
- Travel insurance purchased and policy number stored
- Travel health appointment completed
- Prescriptions refilled with extra supply
- Home security tasks complete (mail, timers, alarm)
- Pet care confirmed
- Packing complete and bags weighed
- All devices backed up and charged
- Itinerary shared with two home contacts
- STEP enrollment confirmed
- Local emergency numbers saved in phone and on paper
For group and family trips, share the checklist via a shared cloud folder so every traveler can confirm their own items. Delegation works best when each person owns a named task with a named deadline, not a vague "handle the documents" assignment.
Key Takeaways
A complete vacation safety preparation workflow requires starting six months out, not six days out: passport checks, insurance timing, and health appointments all have hard lead times that cannot be compressed.
| Point | Details |
|---|---|
| Start documents early | Passport validity and visa processing have fixed lead times; check both at least six months before departure. |
| Health timing is fixed | Schedule your travel health appointment 4–6 weeks out to allow time for multi-dose vaccines and prescriptions. |
| Use a hybrid backup system | Store digital copies of all documents in secure cloud storage and carry printed backups separately from originals. |
| Build a four-phase ownership plan | Assign every task an owner and a deadline; shared checklists prevent gaps in family and group travel. |
| Destlist automates the workflow | Destlist's AI-assisted planning covers visa checks, packing lists, weather alerts, and itinerary sharing in one place. |
Why a staged workflow beats last-minute scrambling
Most travel safety advice is a flat list. Print this, pack that, call your bank. The problem with a flat list is that it has no sequence, no ownership, and no way to catch what you missed until you're standing at a check-in counter with an expired passport.
A staged workflow is different because it forces you to confront time-sensitive tasks when there's still time to fix them. Passport renewals take weeks. Some vaccines require two doses three weeks apart. Travel insurance bought after a hurricane is named won't cover that storm. These aren't edge cases; they're the exact scenarios that derail trips every year.
What I find most underestimated is the delegation problem in group and family travel. When everyone assumes someone else handled the documents, no one did. The ownership table in this article exists specifically for that reason: name the task, name the person, name the deadline. A shared cloud folder with a single checklist file is more reliable than any group chat.
The staged approach also reduces anxiety in a way that ad-hoc prepping never does. When you've completed Phase 1 and Phase 2 with confirmation steps, you know what's done. You're not lying awake at 2 AM the night before departure trying to remember if you called the bank.
Destlist handles the planning so you can focus on the trip
Tracking six months of safety tasks across documents, health appointments, home prep, and digital security is genuinely complex, especially for multi-destination trips or family travel where every person adds new variables. Destlist was built for exactly this situation.
Destlist's AI-assisted planning platform handles the tasks that most travelers forget or delay: visa and entry requirement checks, packing list generation, weather alerts for your travel dates, and day-by-day itinerary mapping with built-in safety considerations. Human travel curators review every plan before it reaches you, so you're not relying on an algorithm alone. A custom travel itinerary is ready to book within 24 hours, with all the safety-relevant details already built in.
For complex itineraries, families, or anyone who has ever missed a passport renewal window, a paid plan pays for itself in avoided mistakes. Start with your destination and travel dates, and Destlist builds the rest.
Useful sources for further reading
- U.S. State Department — International Traveler's Checklist: The official five-step pre-travel checklist covering advisories, documents, and STEP enrollment.
- U.S. State Department — Travel Advisories: Country-by-country advisory levels and detailed safety, entry, and health information.
- CDC — Travelers' Health: Before Travel: Timing guidance for health appointments, vaccines, and prescription planning.
- NHTSA — Tires and Vehicle Safety: Correct tire-pressure checking procedures for road-trip vehicle prep.
- State Department — STEP Enrollment: Instructions for registering with the Smart Traveler Enrollment Program before international travel.